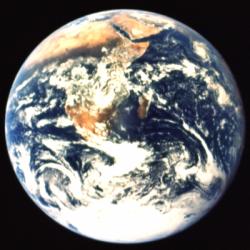
U1: No place like home
U1: No place like home
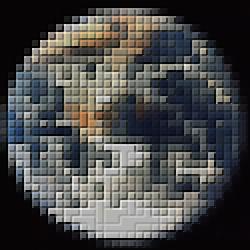
Now let's turn this into our proto-tiles by doing a Pixelize at 8:
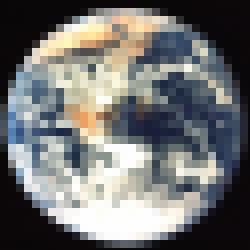
U2: The earth becomes blocky
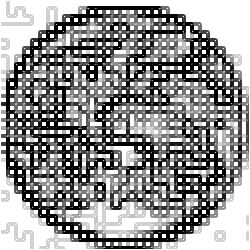
Now, an interesting effect is to Grayify U2, and then Edge Detect it. You wind up with something that looks like this:
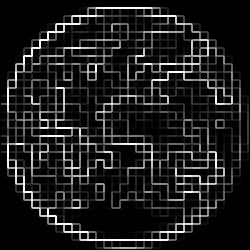
U3: This is our bump map image (almost)
We've almost got a very good image to use as a bump map here. The only problem is it is a bit washed out and undefined in some areas, and that's not very good to use as a bump map. So what we need to do is Invert it and apply BCG to it and lower the contrast quite a bit:
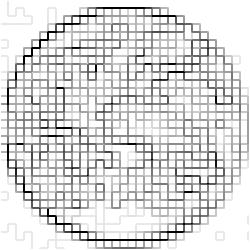
U4: Now our bump map is complete!
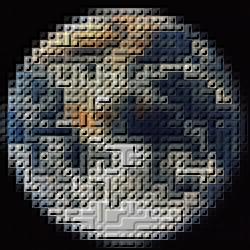
The last step is to apply U4 as a Bump-Map on U2. The resulting image is this:
U5: Pretty cool effect, eh?
U3a: Your bump-map alternative
And now when we apply this to U2, you get a lego® block effect:
U5a: Another nifty effect
What did we learn in this tip? Well, the reason it looks so nifty is because the shadow and highlight effects are applied on color boundaries. We've forced the locations of the boundaries by Pixelizeing the image. You could get a similar effect by using Degrade but it doesn't make quite as interesting an effect. But play around, and see where else you can get this principle to work in a cool way. If it looks good, tell me!
Zach